
1. Charging
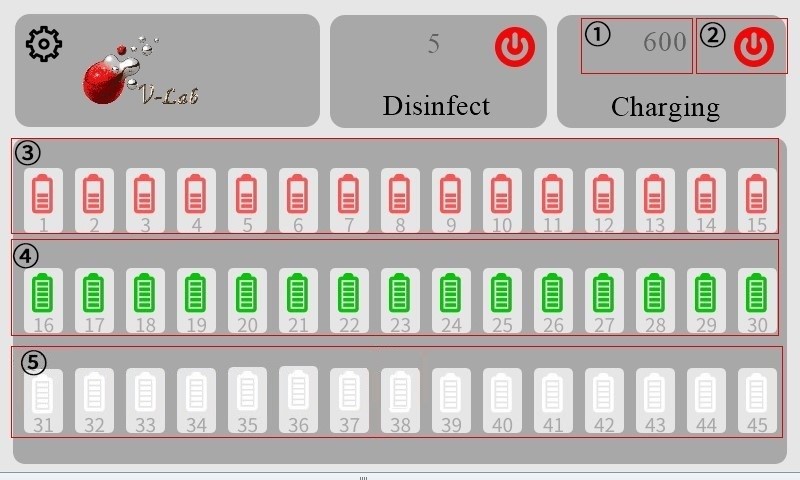
① Display of charging time (Timer can be modified in setting page)
② Charging Button (Press it to start charging. It shows red when working and black when not working.)
③ Red - Indication of charging in progress
④ Green - Indication of fully charged state
⑤ Gray - Indication of unconnected device
2. Disinfection
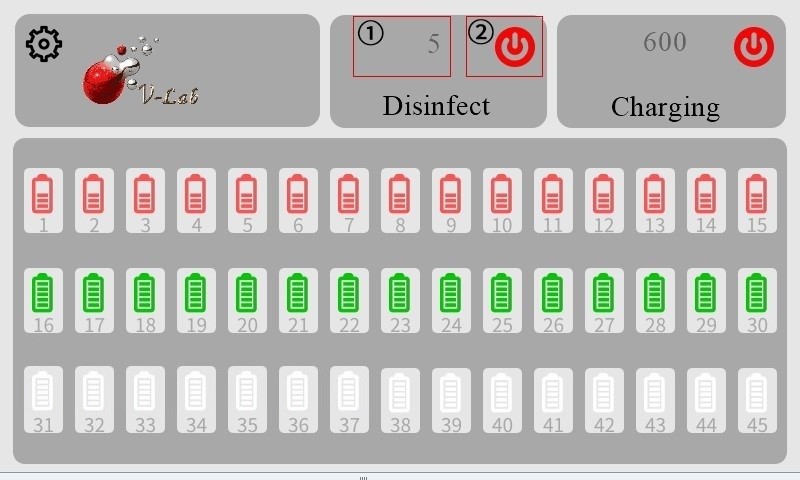
① Display of disinfection time (Timer can be modified in setting page)
② Disinfection button (Press it to start disinfection. It shows red when working and black when not working.)
Note: When the charging compartment door is opened, the disinfection lamp will turn off automatically, but the disinfection time will still be counting.
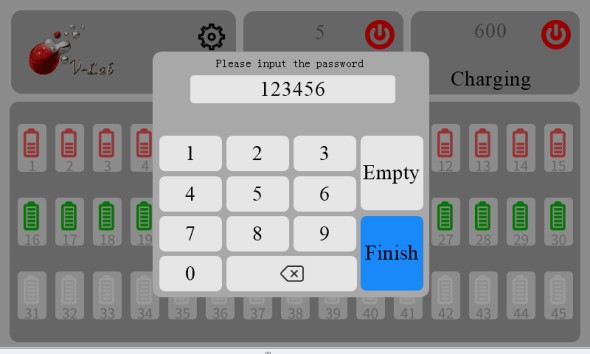
3. Setting
Tap on the settings (gear icon).
Enter the password entry page.
The initial password is “123456”.
Enter the password and tap “Finish” to enter the settings page.
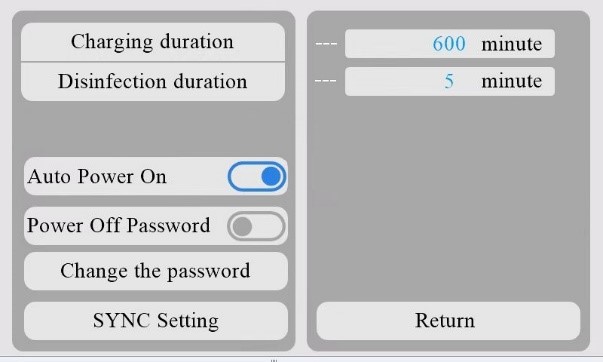
Charging duration -- The time range is from 0 to 999 minutes. When it is set to 0 minutes, the power supply mode will be the long-term power supply mode.
Disinfection duration -- The time range is from 1 to 999 minutes.
Auto Power On – When this toggle switch is turned on (blue), the Charging Cabinet will automatically enter Charging mode once it is connected to a power source. This is useful if you use an external timer to control the specific charging period. It is recommended to set the charging time to 0.
Power Off Password – When this toggle switch is turned on (blue), the Charging Button is locked with a password. This functions as a child or student lock, preventing unauthorized users from disabling the charging mode.
Change the password -- Tap this button to modify the settings password.
Note: After making any changes to these settings, please restart the Charging Cabinet for the new settings to take effect.
